Apple’s firmware for the iPod does not come with any recording capability (unless you buy a third-party recorder). However that does not mean that you are stuck with this limitation forever. If you are limited by Apple’s firmware for the iPod, change it!
Recently I came across the iPodLinux project (http://www.ipodlinux.org/Main_Page), an open source venture dedicated to porting Linux to the iPod. The iPodLinux project uses uClinux (http://www.uclinux.org/), a special variant of the Linux kernel that does not require a MMU (a memory management unit).
The cool thing about iPodLinux is that many additional applications have been written to run on the iPod, adding many capabilities not found in Apple's firmware. The iPodLinux replaces the UI of the iPod with 'podzilla' (http://www.ipodlinux.org/Podzilla
), the default user interface for iPodLinux.
In this article, I will show you how to install iPodLinux onto your iPod and how you can use it to do voice and sound recordings. Note that iPodLinux is currently only supported on 1st, 2nd, and 3rd generation iPods. Fourth generation iPods (includes iPod Mini, U2, iPod Photo, and iPod Shuffle) support are upcoming, but not available at the moment.
Installation
You can download the various installers of iPodLinux for the different platforms – Linux, Windows, and Mac, from http://www.ipodlinux.org/Installation.
For my case, I downloaded the Mac-version of the installer and Figure 1 shows the installer after the installer package was expanded.
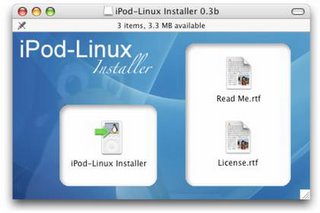 Figure 1. The iPodLinux installer
Before you actually start, you need to ensure that you have enabled your iPod for disk use. This can be enabled in iTunes->Preferences…->iPod (see Figure 2; check the Enable disk use check box).
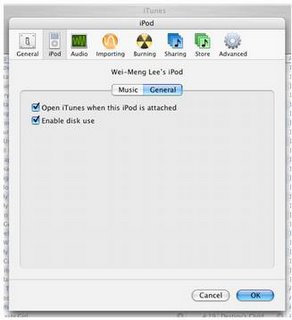 Figure 2. Enabling your iPod for disk use
Launch the iPodLinux Installer and select the iPod that is connected to your Mac (see Figure 3).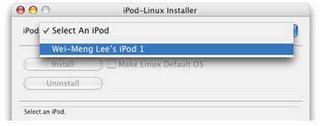 Figure 3. Selecting the iPod to install iPodLinux
To install iPod Linux onto your iPod, click the Install button (see Figure 4). Once installed, you have a choice to boot using iPodLinux, or the original iPod firmware (boots by default). If you want to boot iPodLinux by default, check the Make Linux Default OS checkbox.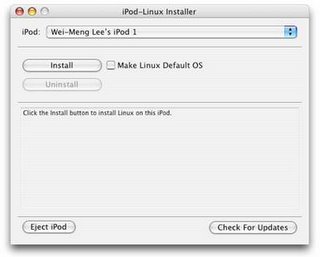 Figure 4. Installing iPodLinux
If the iPodLinux Installer complains that it is unable to install iPodLinux onto your iPod because of some unrecognized format error, you can solve this problem by “reformatting” your iPod using the iPod Updater (from Apple). However, be aware that when you use the iPod Updater, you are essentially destroying whatever content (and songs) you have on your iPod. Thus, remember to backup your iPod before you proceed. The iPod Updater can be downloaded from: http://www.apple.com/ipod/download/. You can then use the iPod Updater to restore your iPod to the original factory setting by clicking on the Restore button (see Figure 5).
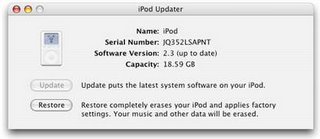 Figure 5. Restoring an iPod to its factory settings
You can now return to the iPodLinux Installer to install iPod Linux onto your iPod. When it is done, you should see the screen as shown in Figure 6 (note that my iPod’s name has been changed after a restore operation).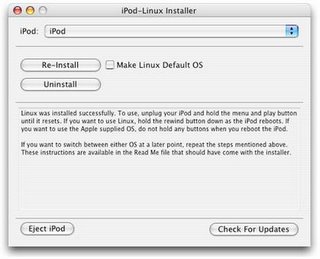 Figure 6. Successfully installing iPodLinux
To boot into iPodLinux, press and hold the Menu and Play buttons (1) at the same time and when the iPod is rebooting, press and hold the rewind button (2). Figure 7 shows the buttons combination.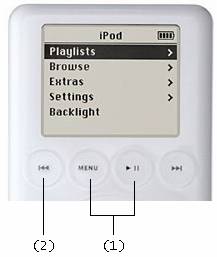 Figure 7. Buttons combinations for booting into iPodLinux
You should now see the Penguin logo on your iPod (see Figure 8), confirming that iPodLinux is installed successfully on your iPod. Figure 8. iPodLinux booting
You will also see the familiar command line (for those Linux users), as shown in Figure 9.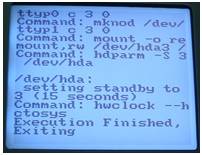 Figure 9. The command line interface of iPodLinux
You should now see podzilla on the opening screen (see Figure 10). The UI looks very similar to Apple’s UI, but with some new functionalities beneath the menu.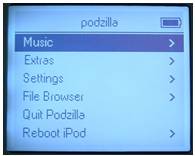 Figure 10. Podzilla
Voice Recording
Recording is one feature that is sorely missing in iPod (unless you buy third-party accessories such as the iTalk). Using the iPodLinux, you can go to the recording feature by navigating to Extras->Recordings (see Figure 11).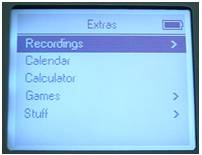 Figure 11. The Extras menu
You have two choices for recording – Mic Record (for use with a microphone) and Line In Record (for use with sound sources such as the audio-out port on your Mac). You can also select the sample rates – 8 kHz, 32 kHz, 44.1 kHz, 88.2 kHz, and 96 kHz (see Figure 12). Figure 12. The Recordings menu
To record voice, you can connect an external microphone to the iPod headphones port and use the Mic Record option. Alternatively, if you do not have an external microphone, you can use your iPod earphones. Yes, this is not a typo; your earphones can be used as a microphone! My experimentation tells me that the left earphone record sounds much clearer than the right earphone. Try it on your own earphones and see if it works!
Once the voice is recorded, you can press the Menu button to return to the Recordings menu and select Playback to hear what you have just recorded. The recording is saved as a .wav file and the latest recording is listed at the bottom. Select the one you want to listen to and press the Action button (see Figure 13).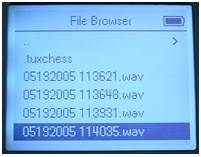 Figure 13. Playing back recorded sound
Transferring Songs from iPod to iPod
Besides recording voice, you can also transfer songs from one iPod to another. I tried playing a song on my iPod photo and then use a connector cable to connect it to my iPod (see Figure 14). The iPod records the song using the Mic Record method (the Line In Record method does not work). However the quality of the recording wasn’t that great – there was some hissing noise.
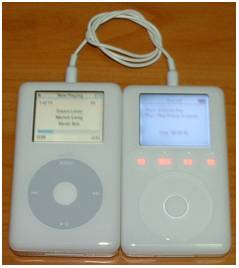 Figure 14. Transferring a song from iPod photo to iPod
However, you need to be aware of the legal issues when you are transferring songs using this method. You are essentially copying songs and so you need to ensure that you have the rights to do so.
Recording Radio to iPod
Another cool use of the recording feature of iPodLinux is for recording radio programmes. You can connect your iPod to the radio’s line-out port and then use the Line In Record method to record the radio programme. Besides the radio, recording directly from your Mac is another possibility. I tried playing a song in iTunes and then use my iPod to record through the line-out connector (again, you need to be aware of the legalities of doing this). The sound quality is pretty good and clear.
Summary
I hope you have a lot of fun using iPodLinux. Be sure to explore the other aspects of iPodLinux, such as games, and other cool applications located in the Extras menu. Have fun!
0 comments: